 LOADING...
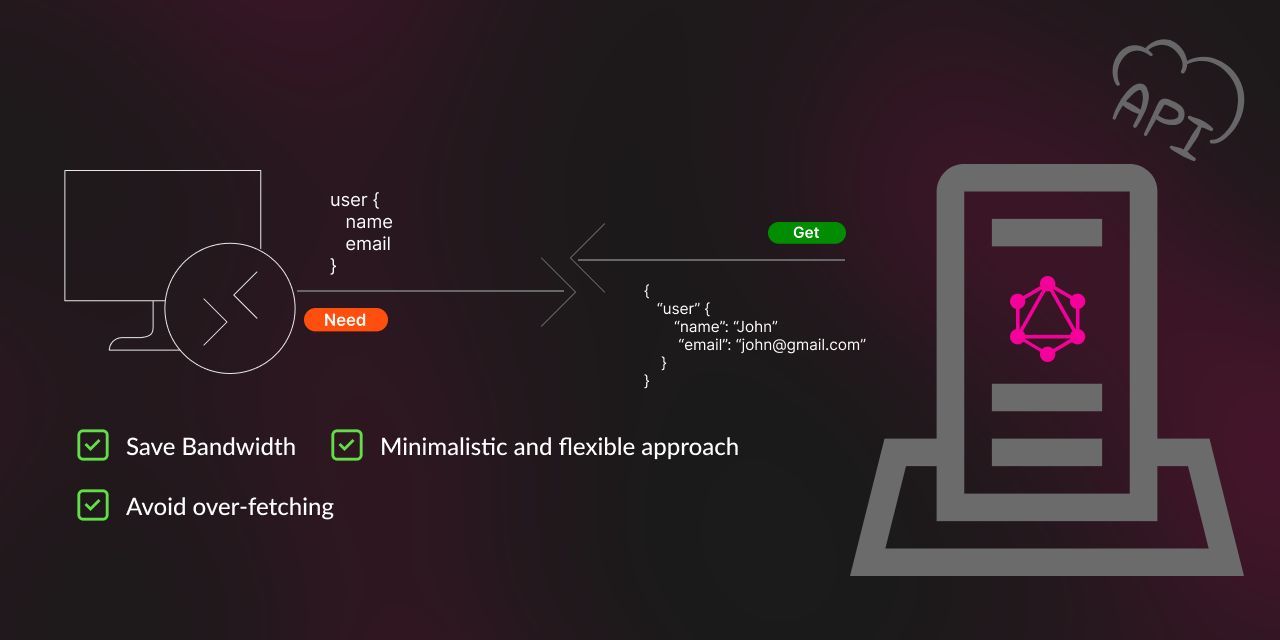
In this article, we’ll explore GraphQL queries and their superiority over traditional REST APIs. I’ll demonstrate their implementation in Node.js, though the concepts apply to any programming language. Let’s begin!
Index
1. What is GraphQL?
2. Why GraphQL?
3. Schemas and types
4. Building a server
5. Schema and resolver
6. Apollo Playground / Postman
7. Working with frontend (React.js)
8. Queries and mutations
9. Final Words
Abbreviation used
1. GQL - GraphQL
What is GraphQL?
GraphQL is a query language and a server-side runtime that allows you to interact with APIs and server-side code. It uses a type system to manage data on the server, and it can work with any programming language. You can also use GraphQL with your existing REST APIs.
Why GraphQL ?
GraphQL is a way to solve the problems we had when working with REST APIs. Let’s see how it works with an example.
Example -
Imagine a user section on your site with 15-20 fields like name, email, and age. You need this user information on multiple pages, but not all or similar information on each page.
Using REST APIs sends all the data in response, which is unnecessary. Applying selection on the request results in multiple lines of code or requests.
GraphQL resolves this issues.
GraphQL lets you get the exact data you want on the client side. It also helps to -
1. Save bandwidth
2. Maintain a minimalistic and flexible approach to APIs
3. Avoid over-fetching unnecessary data by fetching only the required data fields.
Schemas and types
Defining schemes is the first step in writing GQL APIs. It defines the data types for request entries. In GraphQL, defining types in schemas is essential for creating APIs. It’s similar to MongoDB schemas, but with some twists.
We’ll explore how to use this. Before we do, we need to learn a few things.
Object Types and Fields.
Object types are the most basic component of a GQL schema. They define the data types that can be fetched through the API service. Their structure is similar to how types are defined in TypeScript.
type User {
        name: String!
        age: Number!
        address:String
        contact: Contact!
}

type Contact  {
   email:String!
   phone:String
}
User - GQL object type
name, age and Address - Fields in User type.
contact!- it defines list types of contact, means another object types like for email and phone.
String! - its defines non-null string value. Means this value surely return from GQL Service.
Server
Creating server
This will be according to your programming language. As I’m using Node.js, I’ll create the server in Node.js.
Create nodeJs project
npm init
Follow the instructions and your node project will be created instantly. Install nodemon to avoid restarting the program again and again.
npm i nodemon
Just a friendly reminder that if you haven’t installed nodemon yet, you’ll need to run the command every time you make a small change. So, please make sure to install it before proceeding. Thanks a bunch!
Schema
schemas.ts
type Query {
  myuser:User
}

type User {
  name: String
  age: Int
  address:String
   ——
}
To access these queries, write them in GraphQL format using Apollo Server.
import { gql } from 'apollo-server'

const typeDefs = gql`
  type Query {
     myuser:User
  }
`
export default typeDefs;
Now, you’ll need to resolve the query (myuser) in the resolver. This means processing the request and sending the appropriate output. Let’s see how we can do it.
resolvers.ts
Some naming conventions, like Query and Mutation, are sensitive. Spelling mistakes are unacceptable.
const resolvers = {
    Query:{
      myuser: async () => {
            return {
                name: 'john',
                age: 25
            }
        }
   }
}

export default resolvers;
In this request, I set static data to avoid confusion and test the connection instantly. Once the GQL server is set up, you can use the database. We’ll discuss how to work with the database in this query later.
Let’s create the server.
server.js
If you’re working with GraphQL on your own, you’ll need to install Apollo-server, which is an open-source GraphQL server. But if you’re working with a framework like ExpressJS, you don’t need to worry about it because ExpressJS has its own server.
import { ApolloServer } from 'apollo-server'
const port = 3000

const server = new ApolloServer({
  typeDefs,
  resolvers,
  context,
  plugins: [
    ApolloServerPluginLandingPageGraphQLPlayground()
  ]
})

server.listen(port).then(({ url }) => {
  console.log(`🚀 server is ready ${url}`);
})
Lete Start the Server using nodemon
myprofile: async (root, args, { userId }) => {
            if (!userId) throw new Error('You must be logged in')
            return await User.findOne({ _id: userId })
  },
You can now access the Apollo playground at http://localhost:3000. Feel free to experiment with the queries. If you have Postman, it’s a great tool to use for this purpose.
Lets try request query from postman
// Query

{
  myuser {
    name
    age
  }
}

// Response

{
    "data": {
        "myuser": {
            "name": “John”,
            "age": 25
        }
    }
}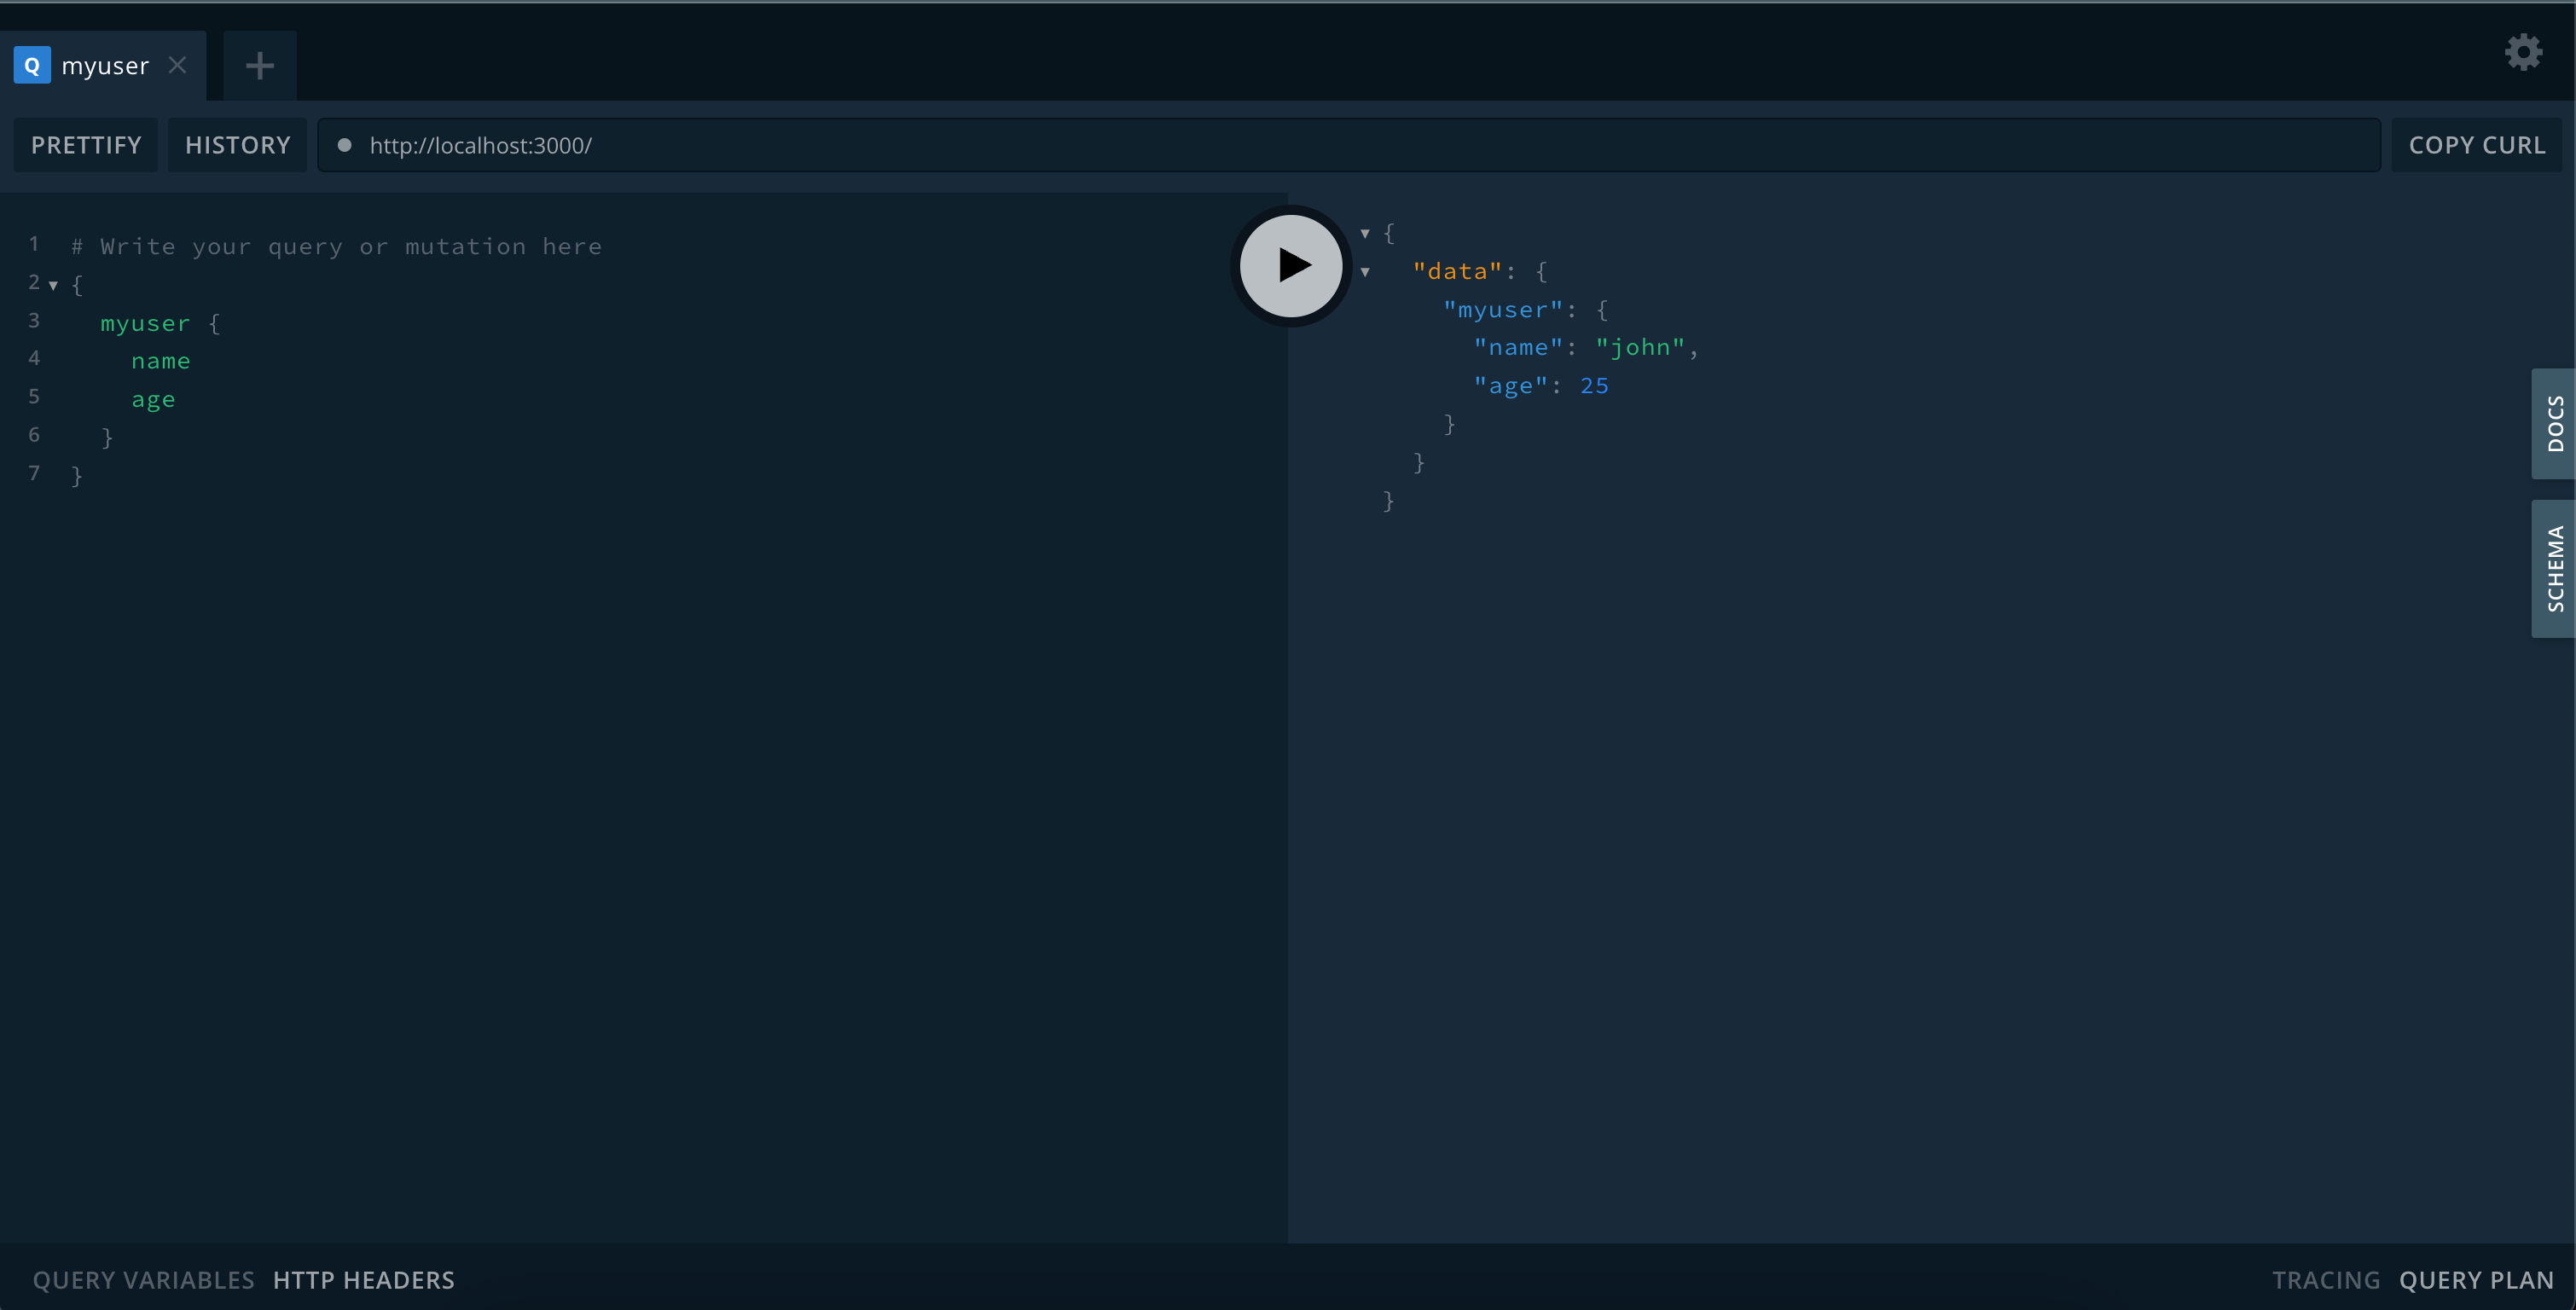
or
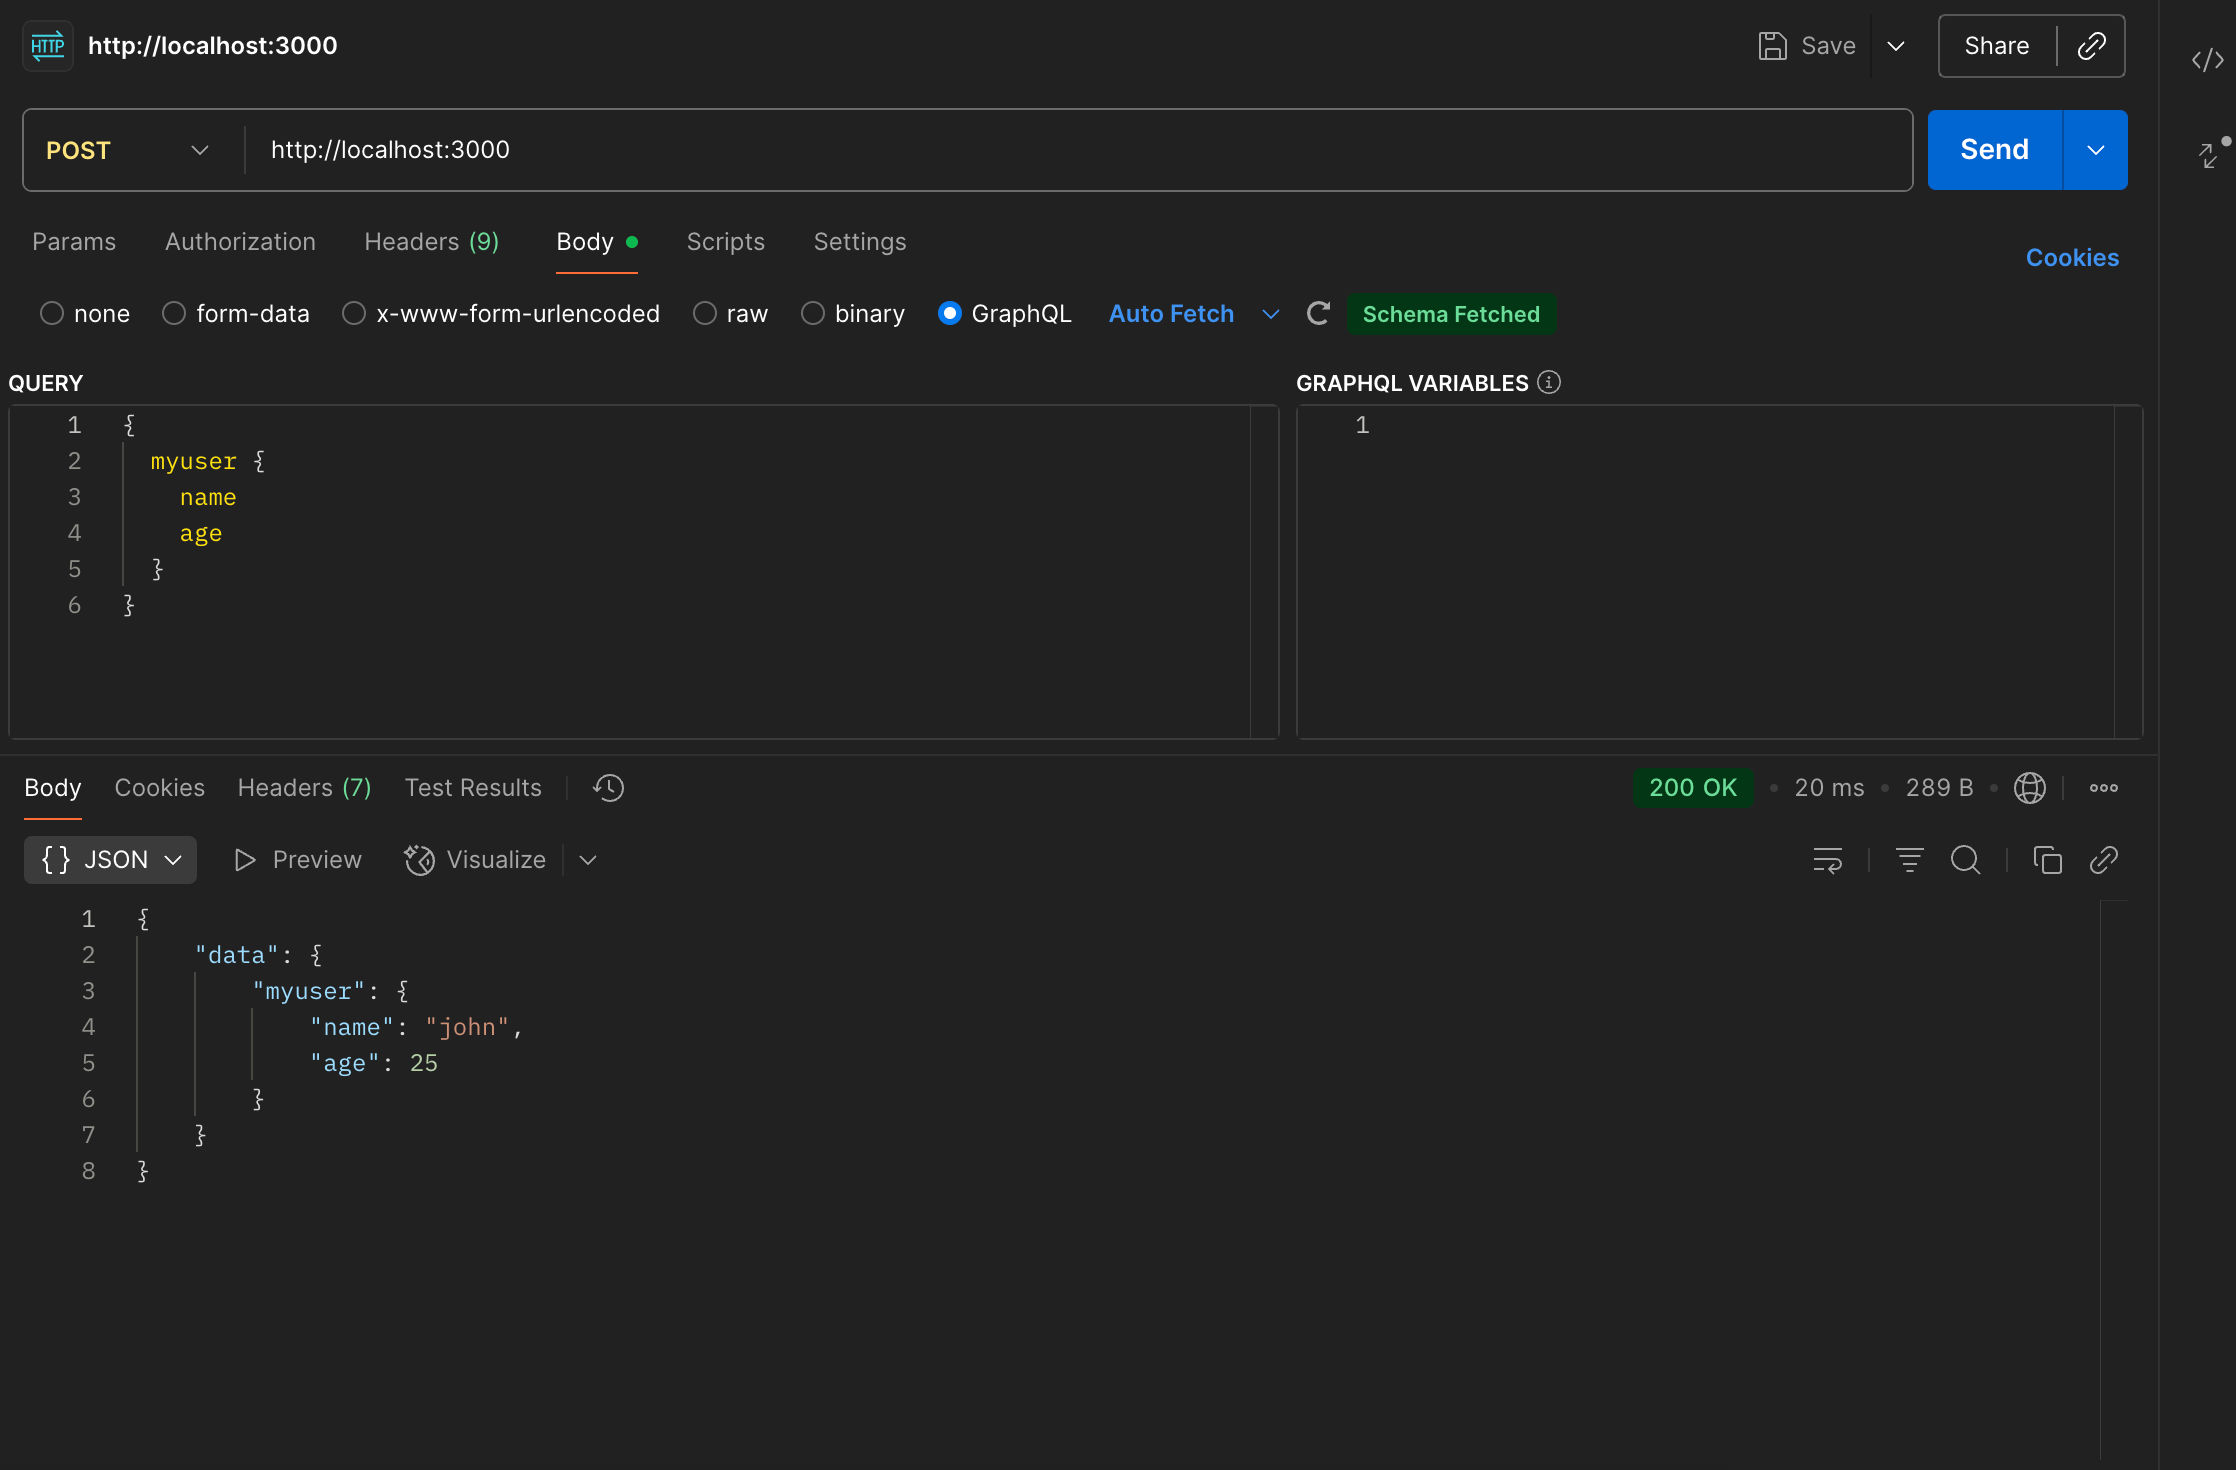
See, here’s the response we get after setting up the response for the query. Before moving on to mutation, let’s see some more information about the GQL query syntax to avoid confusion.
myprofile: async (root, args, { userId }) => {
            if (!userId) throw new Error('You must be logged in')
            return await User.findOne({ _id: userId })
  },
Let’s break down the three parameters in this query:
1. - Root: This represents the parent or root value. If you don’t specify it, it defaults to an empty string.
2. - args: These are the arguments passed to the query.
3. - userId: This is the user ID that’s automatically set when the request is authenticated.
Example
Parent or root value
type Query {
  user: User
}

type User {
  id: ID
  name: String
  posts: [Post]
}

type Post {
  id: ID
  title: String
}
const context = ({ req }) => {
const { authorization } = req.headers;
if (authorization) {
const { userId } = jwt.verify(authorization, JWT_SECRET)
return { userId }
}
}
// We pass this function in resolver. So that context values are get available for each query.
const server = new ApolloServer({
typeDefs,
resolvers,
context,
plugins: [
ApolloServerPluginLandingPageGraphQLPlayground()
]
})Arguments
Arguments are the values in field of query so that its can be use to filter or fetch specific data.
userId - destructured value from context. In GQL, context is a function to retrieve Auth details, such as a bearer token or unique ID, when a request is authenticated.
const context = ({ req }) => {
  const { authorization } = req.headers;
  if (authorization) {
    const { userId } = jwt.verify(authorization, JWT_SECRET)
    return { userId }
  }
}

// We pass this function in resolver. So that context values are get available for each query.

const server = new ApolloServer({
  typeDefs,
  resolvers,
  context,
  plugins: [
    ApolloServerPluginLandingPageGraphQLPlayground()
  ]
})I hope you’ve understood how to create a GQL query and may have tried it yourself. That’s great.
Now lets see how to work with Mutation
Mutation in GQL
Mutation in GQL means modifying server data, similar to how we do with POST requests in REST APIs. In a POST request, we send data through the body. However, GQL has a different approach. Let’s see how it works.
type User{
    _id:ID!
    Name:String
    Email:String
    Password:String
  }

// Mutation

 type Mutation{
    signupUser(userNew:userInput):User
  }

// input Data
input userInput {
    name:String
    email:String
    password:String
  }
In resolver.js
import { gql } from '@apollo/client'

export const SIGNUP_USER = gql`
 mutation createNewUser($userNew:userInput) {
    user: signupUser(userNew:$userNew){
      Name
      Email
    }
  }
`
In the provided code, User.findone is the MongoDB query. To use it, you’ll need to set up your database. If you’re using MongoDB, it’ll work. For other databases, you’ll need to use the appropriate method. The process inside Mutation will be similar to other APIs, and you can modify it as needed.
Try this from Postman or Apollo server, regardless of its functionality. Now, let’s move on to the Frontend part and see how it works there.
Frontend
Let’s see how we can make GQL queries from the frontend to the server. I’ll use React.js for the frontend. To avoid confusion and keep the code cleaner, let’s create two separate folders for queries and mutations.
gqlOprations
->queries
->mutations
Install the official Apollo GraphQL client for the frontend, @apollo/client. It has all the features for queries and mutations.
import { SIGNUP_USER } from "../gqloprations/mutations"
import { useMutation } from "@apollo/client"


export default function Signup() {
  const [name, setName] = useState('');
  const [age, setAge] = useState('');
  const [addUser, { data, loading, error }] = useMutation(SIGNUP_USER);

  const handleSubmit = () => {
     addUser(
          { variables: {
                 name,
                  password
           } });
  };

  return (
    <div>
      <input value={name} onChange={(e) => setName(e.target.value)} placeholder="Name" />
      <input value={age} onChange={(e) => setAge(e.target.value)} placeholder="Age" />
      <button onClick={handleSubmit}>Add User</button>

      {loading && <p>Loading...</p>}
      {error && <p>Error: {error.message}</p>}
      {data && <p>Added: {data.addUser.name}</p>}
    </div>
  );
}
queries.js
import { gql } from '@apollo/client'

export const GET_ALL_USER = gql`
    query getAllUsers{
        Users{
          name
          by {
            _id
            Name
          }
        }
      }
`
To use this query, we’ve provided a hook called useQuery. Let’s see how to use it.
import { useQuery } from "@apollo/client";
import { GET_ALL_USER } from "../gqloprations/queries";

export default function App() {
  const { data, loading, error } = useQuery(GET_ALL_USER);

  if (loading) return <p>Loading...</p>;
  if (error) return <p>Error: {error.message}</p>;

  return <div>{data.myuser.name} - {data.myuser.age}</div>;
}
mutation.js
import { gql } from '@apollo/client'

export const SIGNUP_USER = gql`
 mutation createNewUser($userNew:userInput) {
    user: signupUser(userNew:$userNew){
      Name
      Email
    }
  }
`
Signup.jsx
import { SIGNUP_USER } from "../gqloprations/mutations"
import { useMutation } from "@apollo/client"


export default function Signup() {
  const [name, setName] = useState('');
  const [age, setAge] = useState('');
  const [addUser, { data, loading, error }] = useMutation(SIGNUP_USER);

  const handleSubmit = () => {
     addUser(
          { variables: {
                 name,
                  password
           } });
  };

  return (
    <div>
      <input value={name} onChange={(e) => setName(e.target.value)} placeholder="Name" />
      <input value={age} onChange={(e) => setAge(e.target.value)} placeholder="Age" />
      <button onClick={handleSubmit}>Add User</button>

      {loading && <p>Loading...</p>}
      {error && <p>Error: {error.message}</p>}
      {data && <p>Added: {data.addUser.name}</p>}
    </div>
  );
}Explanation: The useMutation hook provides the -addUser(your function) function and response data, loading, and error variables. This eliminates the need for extra variables for loading and error.
Compare the schema and resolver we created in the backend to understand the process. This helps implement GQL queries step by step.
I’ve previously written an article on how to use GraphQL with ExpressJS. You can refer to it here.
Now, it’s your turn to implement other queries for your project. GQL may seem confusing at first, but with practice, you’ll definitely love it.🙂